


HALLOWEEN COSTUME - SIMS PLUMBOB
Want to attend a costume party but don't want to dress up? Here's a quick and easy DIY for your lazy person needs!

SIMS is practically (in my opinion) one of the greatest role-playing games ever created. One advantage of going as a Sim for Halloween is not having to dress up extravagantly. Any kind of outfit would do due to the fact that some Sims are just computerized people.
First off, you'll need 2 copies of the scaled design pattern for the plumbob. I found one online which looks exactly like the one used in Sims and you can find it by visiting the link pasted below.

source: https://imgur.com/QAxB7H2
All you really have to do now is to print, cut, fold, then glue the pattern! The other materials you need could be seen below.

plumbob pattern, stick, headband, & glue gun
With the four materials above, you can easily finish your DIY Sims plumbob "costume" in less than 30 minutes!
If you've noticed, I cut the hexagonal flap of on of the patterns and created a hole in the middle of the other one. Feeling a little curious? Well, I decided that wearing just a plumbob on my head at night would be a bit boring and unnoticeable so I put my engineering hardware skills to the test and made my plumbob light up in the dark!
This part is completely optional and is not recommend for last minute costume makers and those not interested in engineering hardware HAHA.

desoldering pump, soldering iron, solder, CR2032 lithium battery, magnet, 5mm LEDs, connecting wire, & a 100 ohm resistor
I'm not gonna teach you the basics of soldering because it's kind of hard to explain but you can search for it online and look for tutorials on YouTube!

two LEDs connected in parallel connected in series with a 100 ohm resistor


negative end of the connecting wire the positive end is secured
is taped onto with a magnet onto the positive side
the negative side of the battery to light up the LEDs
This is now where the cut flaps make sense. Go ahead and cut a hole on the tip of the cone that no more hexagonal flap and insert the LED connection until it goes in the hole of the other cone. The hole is where you also insert the stick.


Once that's done, glue the two cones together and secure everything with a glue gun and more connecting wire then you're done!
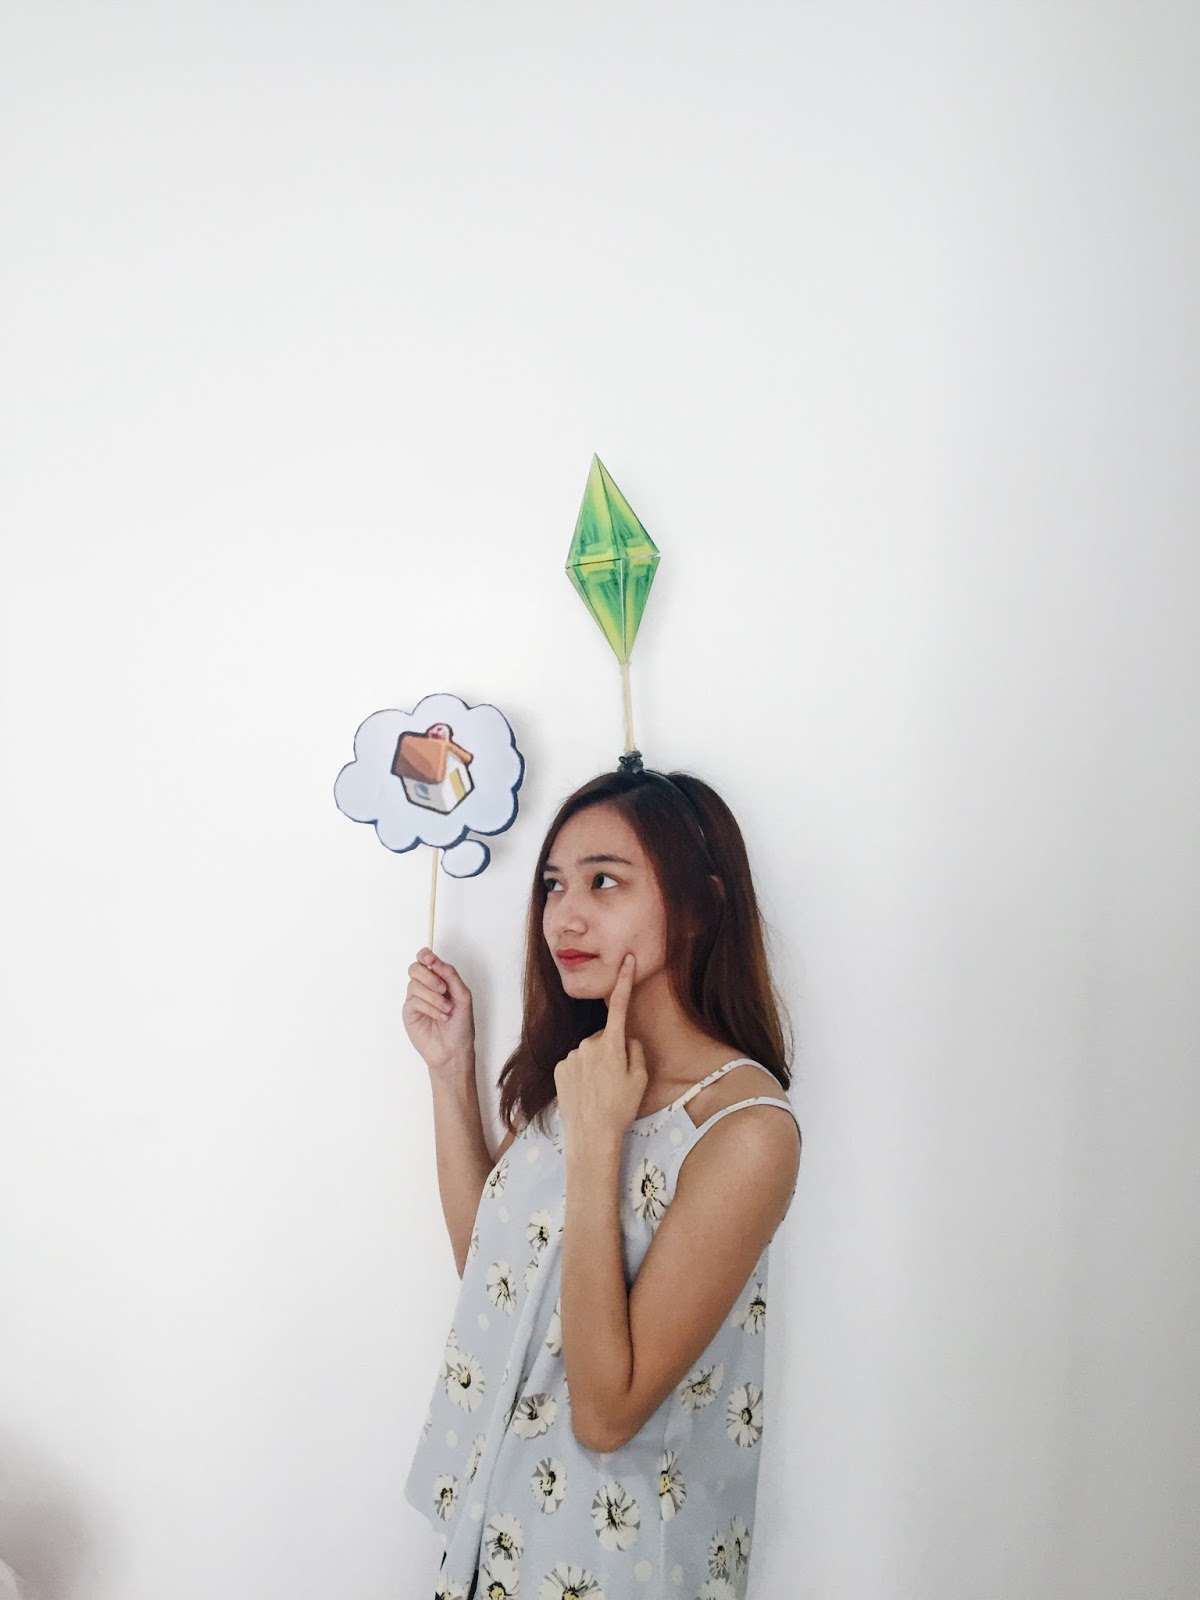
Another optional prop is making the Sims speech bubble! I searched for these images online as well and just printed and pasted them on cardboard and taped them to sticks and voila! You can now be called a Sim!


how it looks like in the dark
Yet another DIY post that you can create and freely upload and post on either Facebook or Instagram with the hashtag #createbylxxreen YAY. 'Til the nest post! xx

♥
ReplyDeleteThank you anon ❤️
DeleteCool and I have a super provide: What Renovations Increase The Value Of A Home best renovations to increase home value
ReplyDelete